Making a Sound
Breathing
Let's face it, the tuba is a big instrument. It's going to need a lot of air. Be sure you've read the section on Posture in Setting Up for Success! Without proper posture, a wind musician will not be able to breathe effectively. It's important to relax any tension in the body, especially the shoulders.
Breathing for playing the tuba should be just as relaxed as normal breathing (the kind of breathing you're probably doing now, while reading this), but much more air must be moved. The breath does not need to be forceful and should not be noisy. A wide opening in the lips will make it possible to draw in a large volume of air without needing to force it.
In order to take in the amount of air required to play the tuba, breathing must happen through the mouth, not the nose. Once the air is in, it should flow back out into the tuba immediately without closing up the throat or holding the air in, which creates tension in the body and friction in the air stream that can affect the tone.
Breathing on the tuba should always be musical. Plan each breath in advance so that it fits the music. Since long phrases are close to impossible on tuba, some phrases may need to be broken up by putting small, unnoticeable breaths into the middle of a longer phrase.
|
The Breathing Gym books and videos may be helpful in building capacity and the understanding of the proper breath. The concept was created by two virtuoso tuba players, Pat Sheridan and Sam Pilafian. All wind musicians should considering adding their techniques to the daily warm-up. The method includes three steps: the Stretch, the Therapy (exercise), and the Flow.
|
|
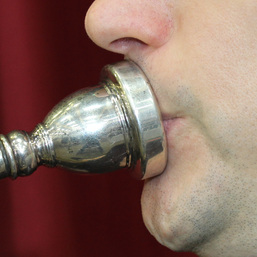
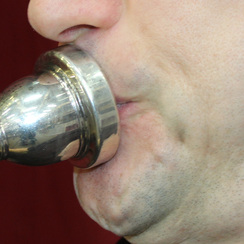
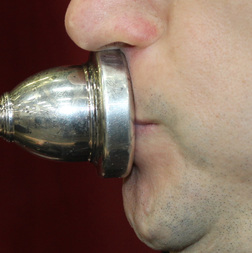
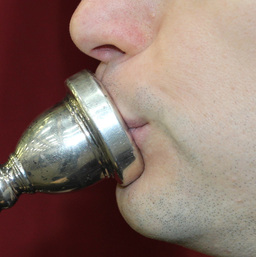
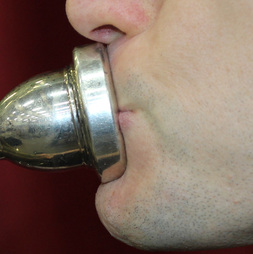
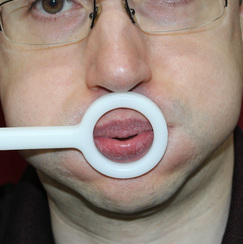
Since many students do not understand many of the breathing concepts mentioned above, use of The Breathing Gym exercises and consistent reinforcement of proper breathing will be necessary. The most common problem is not taking in a sufficient breath of air. A great way to demonstrate the size of opening and flow of air needed to take a breath is to place a short length of 3/4 inch PVC pipe in the lips. The student should memorize what this feels like.
Another common problem is not expelling the air fast enough to make the lips vibrate properly. Tuba students, especially ones who have recently switched from another instrument, may try to conserve their air to achieve longer phrases. This is a good goal to have once the student has learn how to produce a proper tone, but in the beginning, the student should be encouraged to use up all the air quickly, expelling it in a fast stream. Short phrases are acceptable in these early stages.
Another common problem is not expelling the air fast enough to make the lips vibrate properly. Tuba students, especially ones who have recently switched from another instrument, may try to conserve their air to achieve longer phrases. This is a good goal to have once the student has learn how to produce a proper tone, but in the beginning, the student should be encouraged to use up all the air quickly, expelling it in a fast stream. Short phrases are acceptable in these early stages.
Embouchure: "OH-OO-SQUEEZE THE TUBE"
|
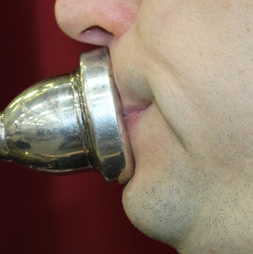
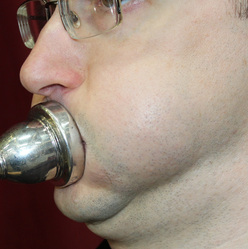
To form the embouchure, have the student begin by bringing the lips together naturally, saying, "emm". Then, place the mouthpiece on the lips and follow these steps:
|
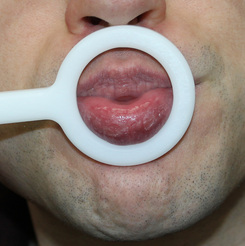
Correct embouchure formation
|
|
"OH"
|
"OO"
|
SQUEEZE
|
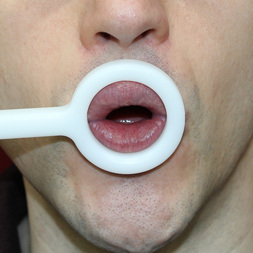
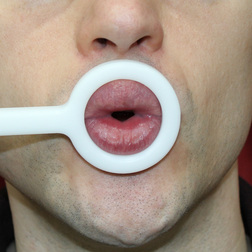
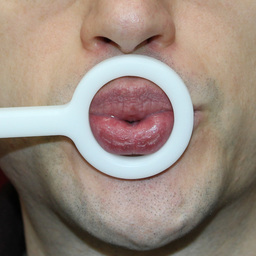
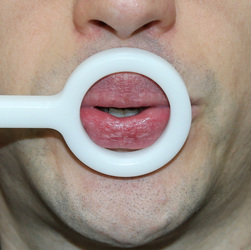
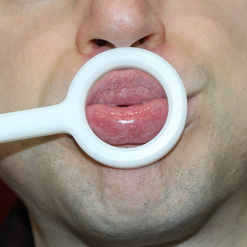
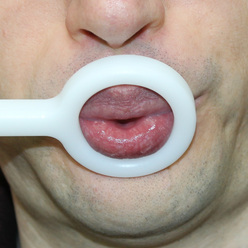
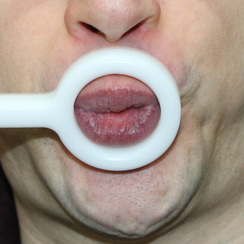
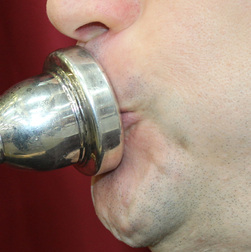
The next step is to put fast air through this formation. The lips should begin vibrating naturally. If they do not, the embouchure is either formed too tightly, too loosely, or not enough air is being used to make the lips vibrate. It may be helpful to use an embouchure ring like the one in these photos to check the position of the lips. Remember, everyone's lips are slightly different, so use your best judgement.
Common Embouchure Problems
|
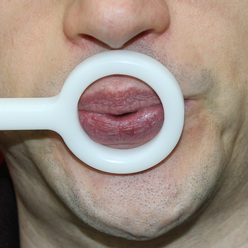
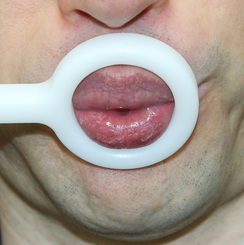
Embouchure Too Loose,
Lips Spread The embouchure is not formed tightly enough, and the lips are spread. Only the sound of rushing air and no tone is produced. The air stream could also be restricted by a closed throat or the tongue being too high. Re-form the embouchure, using the "OH-OO-SQUEEZE" formula, gripping the "tube" more firmly. Emphasize the "OH" shape to keep the tongue down.
|
|
|
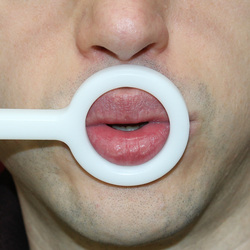
Embouchure Too Tight/Pinched
The embouchure is formed too tightly, with the lips pinched. Not enough air is passing through the lips. The tone is thin and pinched. Loosen the grip on the "tube" and review taking a deep breath and fast air.
|
|
|
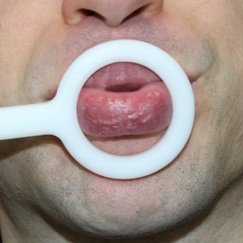
Embouchure Too Loose
with Gargled Tone The embouchure is not formed tightly enough or the lips are folding over the teeth. The sound is gargled. Grip the "tube" more firmly and re-form the embouchure using the "OH-OO-SQUEEZE" formula. Use a ring like the one in the pictures to the left to check lip position.
|
|
|
Embouchure Too Tight,
Lips Completely Pinched The lips are completely pinched together. There may also not be enough volume of air passing between the lips. The sound produced will be intense air with no tone. De-emphasize gripping the "tube" and re-form the "OH-OO" part of the embouchure. Review the tongue position and fast air.
|
|
|
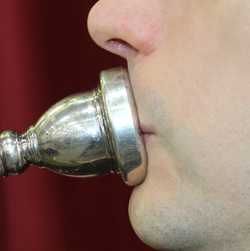
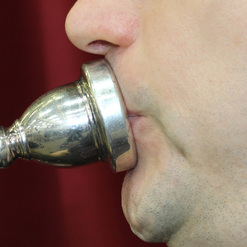
Mouthpiece Angled
Too High The mouthpiece is angled too high or the nose is pointed down. This may be a result of the tuba resting too low on the lap. The student will have trouble playing high notes or maintaining a steady sound. Raise the tuba by bringing the bottom in closer to the body or placing a folded towel or other spacer on the lap on which the tuba can rest.
|
|
|
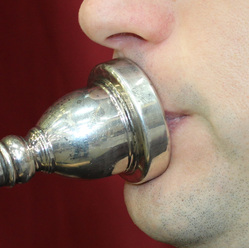
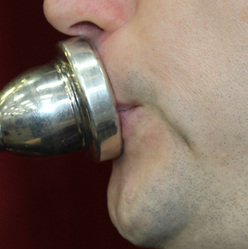
Mouthpiece Angled
Too Low The mouthpiece is angled too low or the nose is pointed up. The student will have trouble playing low or maintaining a steady sound. Check the student's posture to be sure both the player and instrument are upright. If the mouthpiece is too high for the student to reach it comfortably, place the instrument on a lowered tuba stand and/or have the student sit on a stack of books.
|
|
|
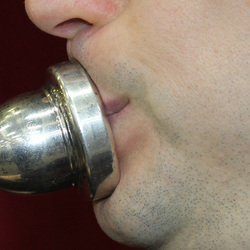
Jaw Pushed
Forward The student is thrusting the jaw forward, using too much bottom lip to create the buzz. Similar to the mouthpiece angle too high, the student will have trouble playing in the high range. Ensure that the mouthpiece is properly aligned and check that the student is using the most natural, relaxed position of the jaw by observing the position of the jaw while the student is not playing.
|
|
|
Jaw Pulled
Back The student is pulling the jaw back, using too much top lip to create the mouthpiece buzz. Similar to the mouthpiece angled too low, the student will have trouble playing low notes. Check the natural placement of the jaw by observing the student while not playing and ensure that the mouthpiece angle is properly aligned.
|
|
|
Puffed
Cheeks The muscles in the cheeks are too relaxed, causing the cheeks to expand. The tone will be thin and difficult to control. Have the student re-form the "OH-OO-SQUEEZE" embouchure and maintain the normal shape of the cheeks. It may help to ask the student to draw the corners of the mouth down just slightly.
|
|
|
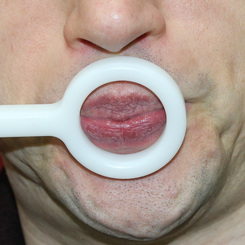
Too Much Pucker
in the Lips The lips form a tight, pucker formation. Similar to the lips being completely pinched, the lips will not be free to vibrate, so there will be the sound of intense or rushing air with no tone. The student should re-form the "OH-OO-SQUEEZE" embouchure and be reminded not to pucker the lips, using only enough pressure to create a flutter or vibration of the lips.
|
|

|
Mouthpiece Placed
Too High The rim of the mouthpiece is placed too high on the embouchure, with the rim preventing the bottom lip from vibrating freely. It will be difficult or impossible to play low notes. The student should reseat the mouthpiece lower on the face, aiming the aperture at the throat of the mouthpiece.
|
|
|
Mouthpiece Placed
Too Low The rim of the mouthpiece is placed too low on the lips with the rim preventing the top lip from vibrating freely. High notes will be difficult and weak. The student should reseat the mouthpiece higher on the face, centering it vertically on the lips.
|
|

Tuba pages site map: What Is a Tuba | Setting Up for Success | Making a Sound | Tuba Positions | The Overtone Series | Tuba Intonation | Practice | Buying a Tuba | Caring for the Tuba | Introducing Students to the Tuba | Bibliography & Image Sources | About
